

Introduction
Deploying a MERN stack application can be challenging, but it becomes manageable with the right approach. In this guide, we'll walk through the steps to deploy your MERN app on a DigitalOcean server using GitHub Actions for continuous deployment. By automating the deployment process, you can ensure a seamless transition from development to production. Let's dive in!
Step 1 - Create a new repository that will host your application on GitHub
Begin by creating a new repository on GitHub to host your application. Follow the steps outlined in GitHub's documentation.
In this case, I created one as shown below :

Step 2 - Create & Configure A New DigitalOcean Server
Before proceeding further, set up a Virtual Private Server (VPS) on DigitalOcean to host your application.
To create a new droplet on DigitalOcean check out this tutorial.
Step 3 - Set up the Nginx, Node.js, and PM2
Configure Nginx, Node.js, and PM2 for your MERN project using the following guides:
Step 4 - Configure Continuous Deployment to DigitalOcean
With the deployment server set up and running, let's Implement a deployment workflow to automate the process of pushing changes to the server.
Configure Self-hosted Runner
We will use the self-hosted runner option in the deployment workflow for deployment. For this example, the runner will be at a repository level hosted on the DigitalOcean Droplet that was set up in the previous section.
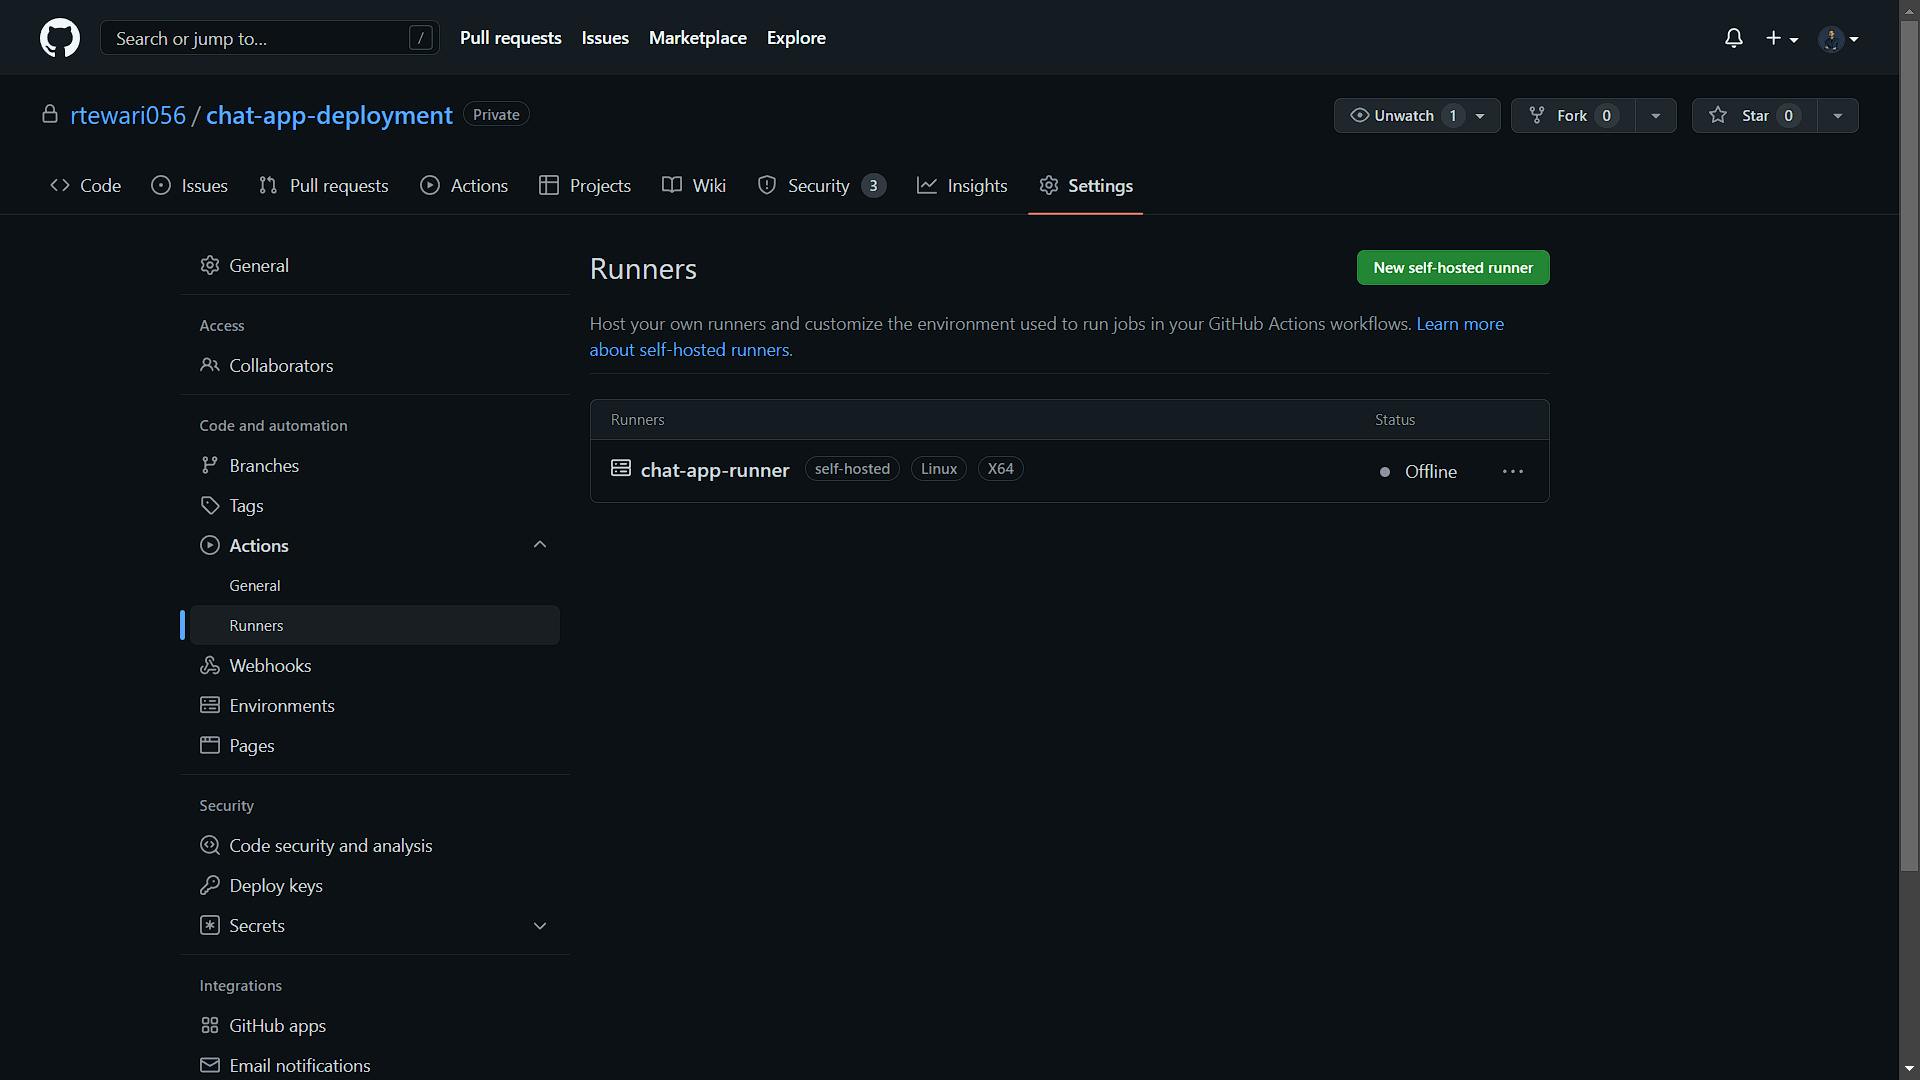
Go to the Settings > Actions > Runners section of the GitHub repository, then click the New self-hosted runner button.

Since we have Ubuntu installed on the Droplet, select Linux as the runner image and x64 as the architecture.

To integrate the self-hosted runner into your Ubuntu server, log in to your VPS via the terminal, and follow the Download and Configure instructions provided in your Settings > Actions > Runners page.
On your local machine, SSH into your server. Use the following command to do so (substitute your username and IP address):
$ ssh USERNAME@SERVER_IP_ADDRESS
If you have too many keys on your local Machine, then you can try specifying which key you want to use:
$ ssh -i ~/.ssh/PRIVATE_KEY_FILE_NAME USERNAME@SERVER_IP_ADDRESS
Let’s start by creating a folder for our application:
rohit@hostname:~$ mkdir your_project_name && cd your_project_name
Download the latest runner package:
rohit@hostname:~$ sudo curl -o actions-runner-linux-x64-2.298.2.tar.gz -L https://github.com/actions/runner/releases/download/v2.298.2/actions-runner-linux-x64-2.298.2.tar.gz
Extract the installer:
rohit@hostname:~$ sudo tar xzf ./actions-runner-linux-x64-2.298.2.tar.gz
The actions-runner-linux-x64-2.298.2.tar.gz package won't be needed again, so let's delete it:
rohit@hostname:~$ sudo rm actions-runner-linux-x64-2.298.2.tar.gz
Before going forward, we need to give the user full access permission to install and configure the runner inside the current directory:
rohit@hostname:~$ sudo chmod -R 777 <PATH_TO_YOUR_PRESENT_WORK_DIRECTORY>
Configure the runner:
rohit@hostname:~$ ./config.sh --url https://github.com/GITHUB_USERNAME/GITHUB_REPO_NAME --token YOUR_TOKEN
You will be asked to enter some information to register your self-hosted runner with GitHub Actions.

Now go to the Settings > Actions > Runners section of your project repository.
If your self-hosted runner successfully registered, you will see your runner is currently offline.
Start the runner as a service:
rohit@hostname:~$ sudo ./svc.sh install
rohit@hostname:~$ sudo ./svc.sh start
If you go to the Settings > Actions > Runners section of your project repository, you will see that self-hosted runner is now successfully started.

Configuring Nginx to display our project
The Nginx configuration is kept in the /etc/nginx/sites-available directory. To create a new configuration, let’s navigate to this directory and create a configuration file pointing to the server block of our Node.js application.
rohit@hostname:~$ cd /etc/nginx/sites-available
rohit@hostname:~$ sudo nano myserver.config
Paste in the following configuration:
# The Nginx server instance
server {
    listen 80;
    server_name your_domain www.your_domain;

    location / {
        # Replace 8080 with the port number where your node js server is running
        proxy_pass http://localhost:8080;

        proxy_http_version 1.1;
        proxy_set_header Upgrade $http_upgrade;
        proxy_set_header Connection 'upgrade';
        proxy_set_header Host $host;
        proxy_set_header X-Real-IP $remote_addr;
        proxy_set_header X-Forwarded-For $proxy_add_x_forwarded_for;
        proxy_set_header X-Forwarded-Host $server_name;
        proxy_cache_bypass $http_upgrade;

        # Security Patches (Optional)
        server_tokens off;
        proxy_hide_header X-powered-by;
        proxy_hide_header X-Runtime;
        add_header X-XSS-Protection "1; mode=block";
        add_header X-Frame-Options "deny";
        add_header X-Content-Type-Options "nosniff";
    }
}
Save the file and exit the editor (CTRL-X+Y+ENTER).
For the next step, let’s enable the above file by creating a symbolic from it to the sites-enabled directory, which Nginx reads from during startup:
rohit@hostname:~$ sudo ln -s /etc/nginx/sites-available/myserver.config /etc/nginx/sites-enabled/
The server block is now enabled and configured to return responses to requests based on the listen port and location path.
let’s check the status of Nginx to confirm that the configuration is working properly:
rohit@hostname:~$ sudo nginx -t
The output upon running the above command would look like this:
nginx: the configuration file /etc/nginx/nginx.conf syntax is ok
nginx: configuration file /etc/nginx/nginx.conf test is successful
The above output confirms that our configuration was successful. Next, restart Nginx to enable your changes:
rohit@hostname:~$ sudo systemctl restart nginx
Create a GitHub Actions workflow file
Clone your project from GitHub on your local computer. Then create a directory named .github in your project's root directory and create a subdirectory named workflows inside the .github directory.
Now go to .github > workflows and create a file with any name you want but make sure it ends with .js.yml so GitHub Actions can recognize it. In my case, I will name the file as deployment.js.yml.
Paste in the following configuration inside deployment.js.yml:
# This workflow will do a clean installation of node dependencies, cache/restore them, build the source code and deploy the application
# For more information see: https://help.github.com/actions/language-and-framework-guides/using-nodejs-with-github-actions

name: Build & Deploy

# Controls when the workflow will run
on:
  push:
    branches: [ "main" ] # Will run on push to the "main" branch

jobs:
  build:

    runs-on: self-hosted # The type of runner that the job will run on

    # Steps represent a sequence of tasks that will be executed as part of the job
    steps:
    - uses: actions/checkout@v3
    - name: Use Node.js 18 # We can make it more understandable by adding names to the steps
      uses: actions/setup-node@v3.5.0
      with:
        node-version: '18.x' # Change according to the installed version
        cache: 'npm'

    - name: Install dependencies
      run: |
        npm install
        cd frontend
        npm install

    - name: Creating a Production Build of React App
      run: |
        npm run build
        cd ..

  create-envfile:

    runs-on: self-hosted
    needs: build # Run only after the 'build' job is completed

    steps:
    - name: Create .env file
      # Creates an '.env' file with environment variables
      run: |
        touch .env
        echo JWT_SECRET_KEY=${{ secrets.JWT_SECRET_KEY }} >> .env
        echo MONGO_URI=${{ secrets.MONGO_URI }} >> .env
        echo PORT=${{ secrets.PORT }} >> .env
        echo NODE_ENV=${{ secrets.NODE_ENV }} >> .env

  deploy:

    runs-on: self-hosted
    needs: [build, create-envfile] # Run only after the 'build' and 'create-envfile' job is completed

    steps:
    - name: Deploy to production
      # Starts your node js app in 'PM2'
      run: |
        pm2 stop ecosystem.config.js
        pm2 start ecosystem.config.js
        pm2 save
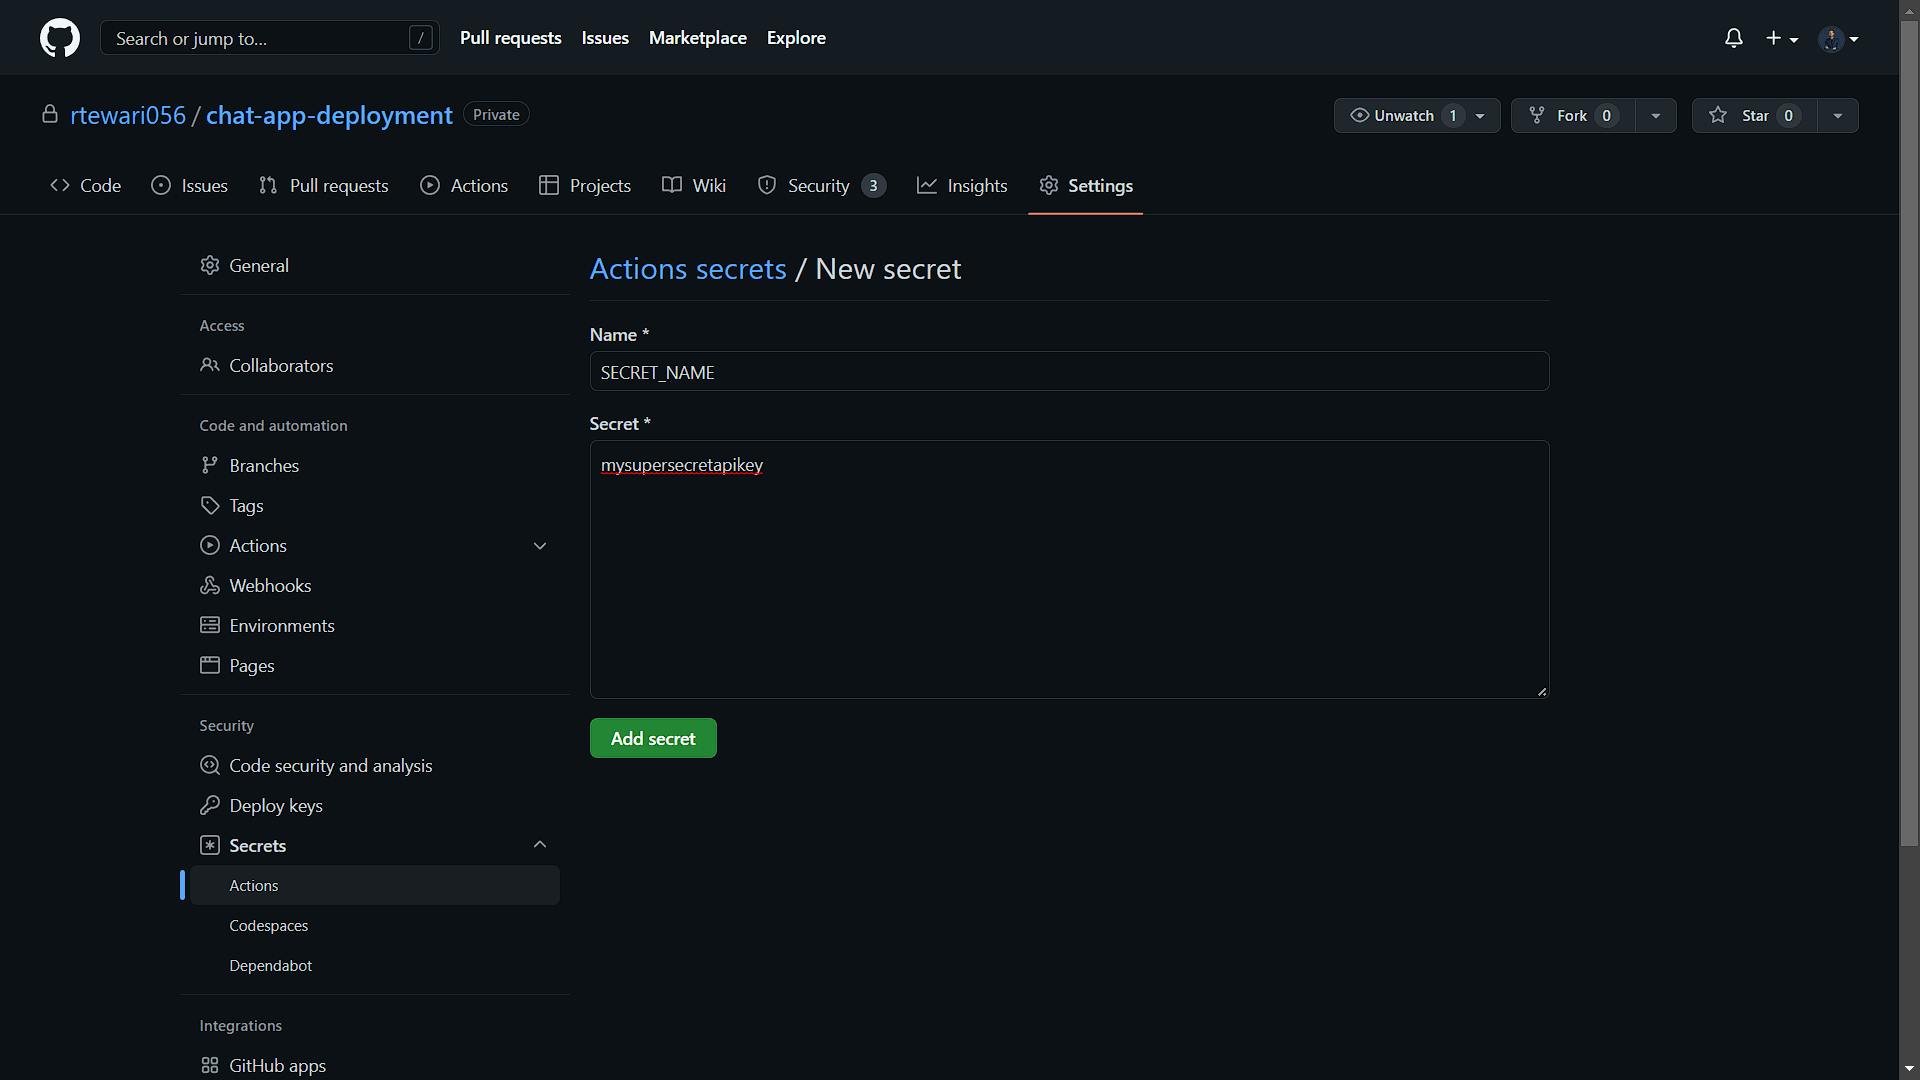
If you are using .env file to use environment variables inside your project, you have to define actions secrets in your GitHub repository.
To define secrets, go to Settings > Secrets > Actions and click on New repository secret button. Then add your environment variable name and value inside the textarea.
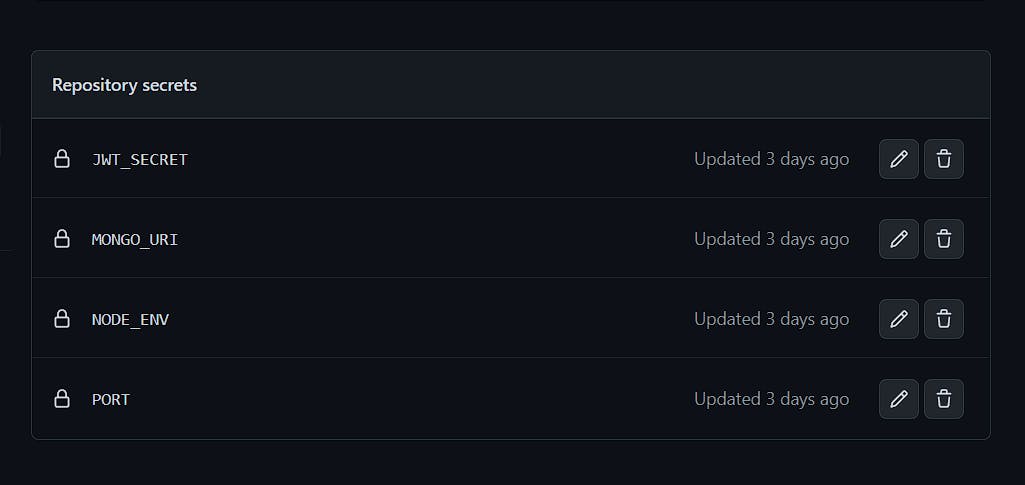
After adding the secrets it will look like this:
Along with that, we will also create a configuration file named ecosystem.config.js in our project root directory for PM2 so we can easily start/stop/restart our node js application whenever we push changes to GitHub. You can name it anything but make sure it ends with .config.js so PM2 can recognize it as a configuration file.
Paste in the following configuration inside ecosystem.config.js:
module.exports = {
  apps: [
    {
      name: "chat-app",
      script: "./backend/server.js",
    },
  ],
};
Replace chat-app with your application name and ./backend/server.js with the relative path of your node js entry point file.
Finally, push the changes to GitHub to trigger the workflow.
Conclusion
Upon completion, check the Actions tab in your GitHub repository to monitor the workflow's progress. A successful deployment will be indicated by a green checkmark.